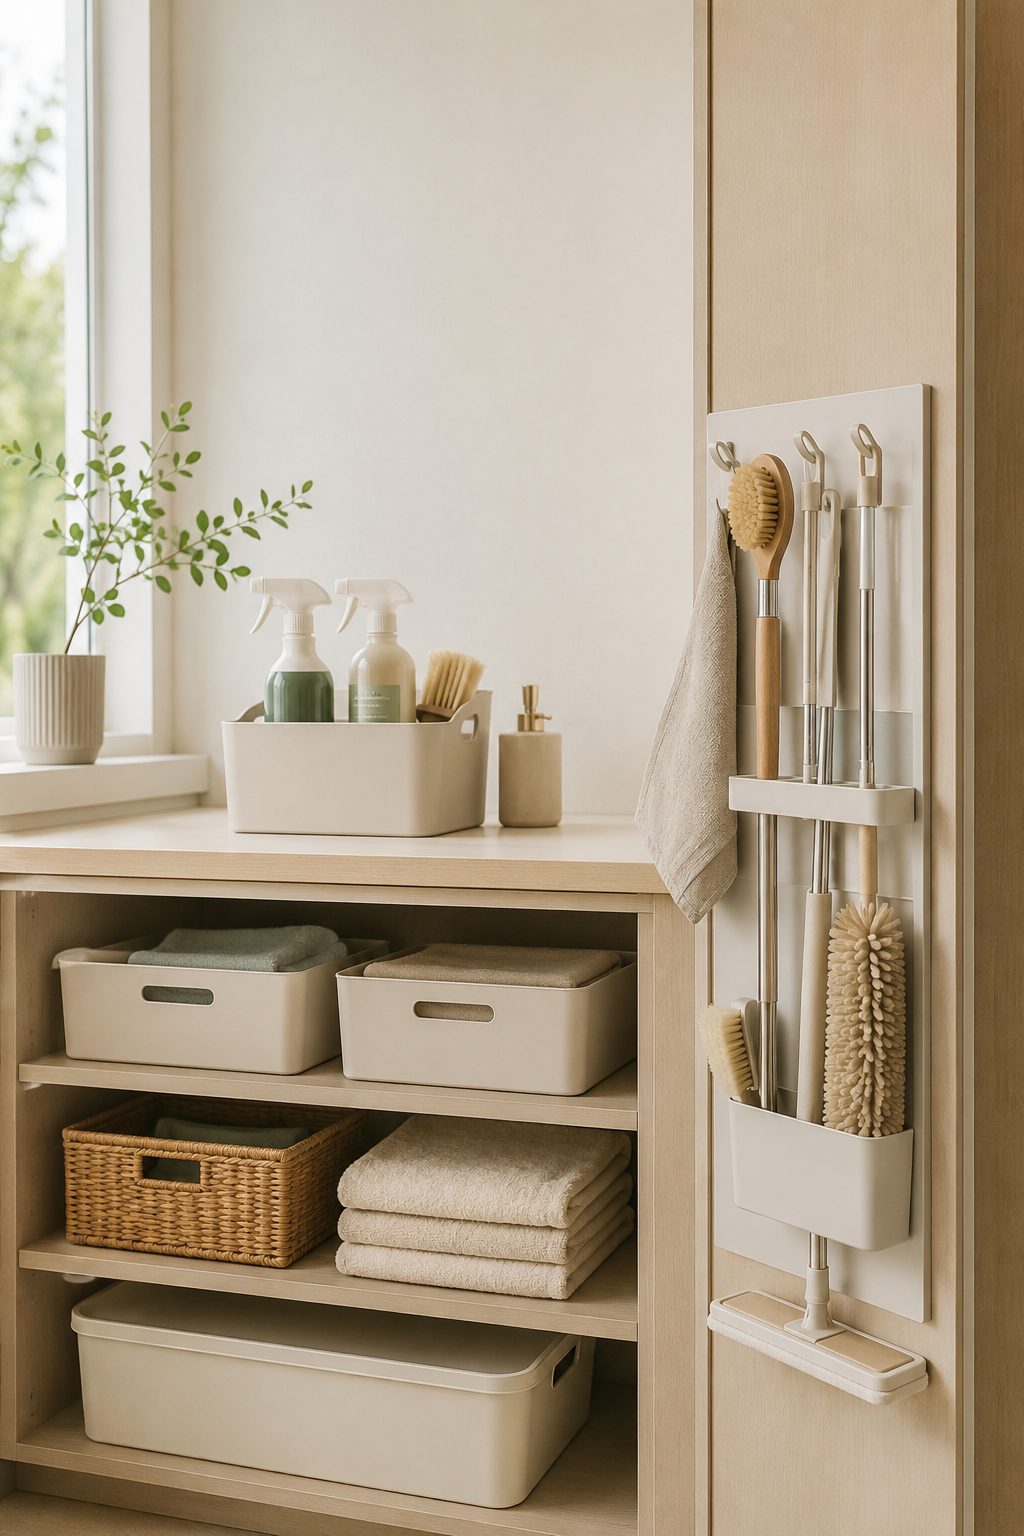
Cleaning supplies have an annoying habit of taking up more space than expected.
A few bottles under the kitchen sink.
A mop somewhere in the corner.
A vacuum leaning against a wall.
Extra cloths stuffed into a drawer.
Brushes scattered around the bathroom.
Before long, the cleaning supplies themselves can start making the home feel cluttered.
This is especially noticeable in a small apartment or home where there may not be a dedicated utility room.
The solution isn’t necessarily to buy more storage.
It’s to make the storage space you already have work harder.
With the right combination of vertical storage, baskets, hooks, organizers and simple categories, you can keep cleaning supplies accessible without allowing them to take over your home.
Here are 11 practical cleaning storage ideas worth considering.
1. Create a Dedicated Cleaning Zone
The first step is deciding where your cleaning supplies actually belong.
Instead of keeping products wherever you happen to have used them, create a dedicated cleaning zone.
Depending on your home, this could be:
- An under-sink cabinet
- A kitchen cabinet
- A bathroom cabinet
- A utility cupboard
- A freestanding storage unit
- A small section of a laundry area
The exact location matters less than having a consistent system.
Keep everyday supplies accessible
Products and tools you use regularly should be easier to reach than backups or occasional-use items.
This prevents you from having to empty an entire cabinet every time you need a cloth or cleaning brush.
2. Make Better Use of the Inside of Cabinet Doors
The inside of a cabinet door is often unused space.
Suitable door-mounted organizers can provide additional room for smaller cleaning supplies.
Depending on the organizer, you could store:
- Sponges
- Cloths
- Brushes
- Gloves
- Small bottles
- Cleaning accessories
Check the clearance first
Before installing anything, make sure the organizer doesn’t interfere with shelves, pipes or the cabinet closing properly.
In a small home, every bit of additional storage can help—but only if the system remains practical.
3. Use Stackable Bins
Vertical space is often wasted inside cleaning cupboards.
A suitable stackable bin can create another storage level without requiring a larger cabinet.
For example, one bin could contain:
Cleaning cloths
while another contains:
Brushes and small tools
You can pull out the bin instead of searching through individual items.
Avoid excessive stacking
If you have to remove several containers to reach the one underneath, the system becomes inconvenient.
Stack only as high as remains easy to access.
4. Use a Pull-Out Organizer Under the Sink
Under-sink cabinets can be awkward because plumbing pipes often occupy the centre.
A pull-out organizer can make some of that difficult space easier to use.
Depending on the cabinet design, it can provide accessible storage for:
- Cleaning sprays
- Sponges
- Brushes
- Cloths
- Dishwasher supplies
- Other suitable household products
Measure before buying
Under-sink cabinets vary considerably.
Check:
- Cabinet width
- Cabinet depth
- Available height
- Pipe position
- Door clearance
A product that looks perfect online may not fit your particular cabinet.
5. Use a Slim Cleaning Caddy
If you don’t have a dedicated cleaning cupboard, a portable caddy can act as a small mobile cleaning station.
Keep your most frequently used supplies together and carry the caddy from room to room.
A suitable caddy might hold:
- Cloths
- Brushes
- Gloves
- Appropriate cleaning products
- Small tools
When you’re finished, return the entire caddy to its storage location.
Why this works
Instead of scattering cleaning products around the home, you’re creating one controlled collection.
This can be particularly useful in apartments without utility rooms.
6. Hang Brooms and Mops Vertically
Long-handled cleaning tools can be some of the most difficult items to store in a small home.
A broom or mop leaning against the wall takes up floor space and can easily fall over.
Suitable wall-mounted holders or hooks can allow these tools to be stored vertically.
This can free up valuable floor space.
Choose the location carefully
A utility cupboard, laundry area or other appropriate location may work well.
Make sure the mounting method is suitable for the wall and the weight of the tools.
7. Store Cleaning Cloths in a Dedicated Basket
Cleaning cloths don’t need an entire cabinet.
A small basket or bin can keep them together and easy to access.
You could separate:
Clean cloths
from
Used cloths waiting for laundry
This prevents used cloths from being mixed with clean ones.
Keep the system simple
You don’t need a separate basket for every type of cloth unless your household actually benefits from that level of organization.
One clean-cloth basket and an appropriate laundry system may be enough.
8. Use Clear Containers for Small Cleaning Accessories
Small cleaning supplies can disappear inside deep cabinets.
Clear containers or suitable transparent organizers can make them easier to see.
They can be useful for items such as:
- Replacement sponges
- Scrubbers
- Small brushes
- Cleaning pads
- Gloves
- Other accessories
The benefit is visibility.
Instead of rummaging through a drawer, you can quickly see what you have.
Don’t transfer chemicals unnecessarily
Clear storage is more appropriate for suitable accessories and non-hazardous items.
Cleaning chemicals should remain in their original packaging unless the product instructions specifically support another storage method.
9. Create a Separate Area for Backup Supplies
There’s a difference between:
What you use every week
and
What you bought in bulk because it was on sale.
Keeping both together can make your everyday cleaning area unnecessarily crowded.
Create a separate section for backup supplies where practical.
For example:
- Everyday zone → current cleaning products
- Backup zone → unopened replacements
This makes it easier to see what you actually need to restock.
10. Use a Narrow Utility Cart
If you genuinely don’t have enough cabinet storage, a slim rolling cart can provide additional organization without requiring a full storage cabinet.
Depending on the design, it could hold:
- Cleaning products
- Cloths
- Brushes
- Laundry supplies
- Other suitable household items
The advantage is that the cart can be moved when necessary.
Measure your narrow spaces
A slim cart can sometimes fit between:
- A washing machine and wall
- A cabinet and appliance
- A bathroom vanity and wall
But make sure there’s enough clearance to use it comfortably.
11. Give Every Cleaning Tool a Specific Home
This is perhaps the most important storage habit.
Your cleaning system doesn’t need to be complicated.
It simply needs to answer:
Where does this go when I’m finished?
For example:
- Broom → wall holder
- Mop → utility area
- Cloths → basket
- Brushes → small container
- Everyday sprays → caddy
- Backup supplies → separate cupboard section
Once everything has an obvious home, putting supplies away becomes much easier.
How to Organize Cleaning Supplies in a Small Apartment
If you don’t have a utility room, don’t worry.
You can distribute supplies strategically while still keeping the overall system organized.
For example:
Kitchen
Keep suitable everyday kitchen-cleaning tools near the kitchen.
Bathroom
Keep appropriate bathroom-cleaning tools in or near the bathroom.
Main cleaning zone
Keep the main collection of supplies in one cabinet, cupboard or caddy.
This can be more practical than forcing every single cleaning product into one tiny cabinet.
Under-Sink Storage: What Goes Where?
The area under the kitchen sink can be especially useful, but it should be organized carefully.
You might divide it into:
Everyday tools
Cloths, sponges and suitable brushes.
Cleaning products
Appropriate products stored securely.
Backup supplies
Unopened replacements.
Waste-related items
Suitable bin liners and related supplies.
Avoid overcrowding the cabinet.
You need enough space to retrieve items without knocking everything else over.
Use Vertical Space Before Adding More Floor Furniture
When floor space is limited, look upward.
A wall-mounted holder may be more useful than a floor-standing rack.
A shelf may provide more practical storage than another cabinet.
A door-mounted organizer may use space that would otherwise remain empty.
This principle applies throughout a small home:
Before adding another piece of furniture, ask whether unused vertical space can solve the problem.
Don’t Let Your Cleaning Storage Become a Safety Problem
Cleaning products require thoughtful storage.
Keep products in their original containers where appropriate and follow their labels.
Avoid mixing cleaning chemicals.
Store products securely where required, particularly if children or pets are present.
Don’t place potentially hazardous products somewhere they can easily fall or leak onto other belongings.
Organization should improve safety
A well-organized cleaning cupboard should make it easier to identify and retrieve the right product—not simply pack as many bottles as possible into the smallest space.
How to Keep Cleaning Storage Organized
Once you’ve created the system, maintaining it should be simple.
After cleaning
Return tools to their designated locations.
When something runs out
Add it to your shopping list.
When buying backups
Put them directly into the backup zone.
Every few months
Check for:
- Empty containers
- Products you no longer use
- Damaged tools
- Duplicate supplies
- Items that have been stored incorrectly
A short reset can prevent the cupboard from becoming chaotic again.
Small Cleaning Storage Ideas for Renters
If you’re renting, you may not want to drill into walls or install permanent systems.
There are still plenty of options.
Consider:
- Freestanding carts
- Removable organizers where appropriate
- Storage baskets
- Portable cleaning caddies
- Freestanding shelving
- Suitable over-door organizers
Always check the product requirements and your rental agreement before attaching anything to walls, doors or cabinets.
Don’t Buy Storage Before You Declutter
One common mistake is buying organizers before deciding what actually needs organizing.
You can end up with:
Too many products + too many containers = organized clutter
Instead:
Step 1
Remove empty or unnecessary items.
Step 2
Group similar supplies.
Step 3
Identify the storage space available.
Step 4
Measure it.
Step 5
Buy only the organizers that solve the remaining problems.
This approach can save both money and space.
A Simple Cleaning Storage System
If you’re starting from scratch, you can keep it very simple:
Zone 1 — Everyday cleaning
Frequently used products and tools.
Zone 2 — Small accessories
Sponges, cloths, brushes and similar items.
Zone 3 — Backup supplies
Unopened replacements.
Zone 4 — Long-handled tools
Broom, mop and similar equipment.
You don’t need dozens of categories.
The simpler the system, the easier it is to maintain.
Final Thoughts
Cleaning storage doesn’t need to be complicated.
In a small home, the goal isn’t to create a huge collection of organizers.
It’s to make the space you already have more useful.
Use cabinet doors.
Go vertical.
Contain small accessories.
Separate everyday supplies from backups.
Use portable caddies.
Store long-handled tools efficiently.
And give every cleaning tool a home.
Most importantly, don’t let your cleaning supplies become another source of clutter.
Smart Space Finds takeaway
The best cleaning storage system is one that makes your tools easy to find, easy to put away and easy to use.
You don’t need a dedicated utility room to achieve that.
With a few thoughtful storage decisions, even a small apartment can have a cleaning system that feels organized and manageable.
For more ideas in the same spirit, explore the organization section, or keep going with our guide to 10 genius small-space storage ideas and the kitchen and small spaces sections.